

This is a lesson plan to introduce the Holy Mysteries.
Please click on the images below for links to lesson plans on each individual Mystery.
TEACHING ABOUT EACH MYSTERY
Click on the images to go to a separate lesson plan for each individual Mystery.


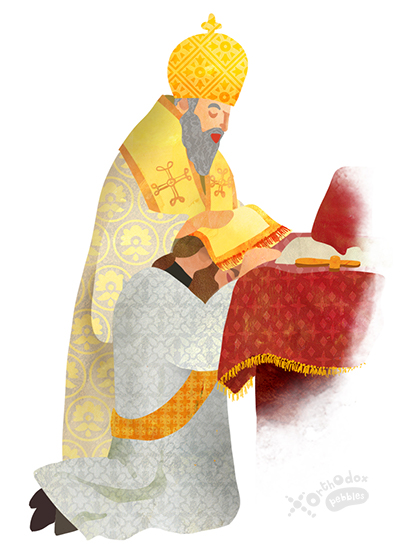

INTRODUCTION TO THE HOLY MYSTERIES
The Orthodox Church teaches that the only way for the faithful to reach theosis, that is, union with God, is to live a liturgical life within the Church: “outside the Church there is no salvation” (St. Cyprian of Carthage, +258). Therefore, participation in the Holy Mysteries is a fundamental part of an Orthodox Christian’s life, with first and foremost participation in the Mystery of Holy Communion.
We have compiled a variety of resources to help organize a teaching unit on the Holy Mysteries. In this page, you will find suggestions, activities, and background information for an introductory lesson, clarifying the concept of a “mystery” and presenting the seven Mysteries. You will then find links that lead to a separate page for each individual Mystery, with its own lesson plan and activities.
The topic of the Holy Mysteries has such incredible depth, that it is considered appropriate to be taught to children in Middle School and above. We should mention here that the Greek Orthodox Archdiocese is offering a great resource for teaching the Mysteries at a higher level (student book – teacher’s book). However, we have seen that it is helpful if the Mysteries are introduced at a younger age, and revisited in more detail when the children get older.
OUR MATERIAL
Terms of use
Please note: The copyright of our work belongs solely to Orthodox Pebbles. We are offering our material to the public to be used as a whole, and only for classroom and personal use. This means we do not allow for users to break our material up into individual parts (images or text), and use those parts in their own creations – analog, digital, or online – even if these creations are only meant to be used for teaching. For example, a user is not permitted to include our material in any way in their own slideshows, worksheets or videos (local or in the “cloud”), even if they mention us as the source. If you are interested in creating a specific teaching activity with our material, please contact us – we may be able to create it instead, for the benefit of the whole Orthodox community.
Additionally, we love to see photos on social media of our creations being used. However, if you want to showcase our material in a different way on a website, newsletter, blog or social media post, please contact us first.
Finally, we kindly ask that you do not directly share the material you download from our website with others. Please point them to our website instead, so they can download it from here.
Thank you for being fair and respectful of our work!
FREE PRINTABLES

Click to download
(11.6 MB)
Printing problems? PLEASE CLICK HERE
TEACHING ABOUT THE MYSTERIES
Objectives
At the end of the lesson, the students should be able to:
Younger children
- Say the word “Mystery“.
- Explain that the Mysteries are situations in our life within the Church when God is actually present with us, blessing us with His grace.
- Name some of the Mysteries with help from visual aids.
Older children
In addition to the above, older children should be able to:
- Explain that a Mystery is something that is hidden, which we cannot fully understand.
- Explain that, in the Mysteries, the grace of God is conveyed to us through a physical, visible object, called a symbol.
- Recount all seven Mysteries with help from visual aids.
- Match each Mystery to a part of the prayer the priest says when officiating the service.
- Name some of the symbols and match them to the relevant Mystery. At the introductory lesson, even one or two symbols would be enough. When all the Mysteries have been individually taught, the children should be able to match all the Mysteries to their symbols.
PLANNING THE LESSON
Don’t miss the SLIDESHOW we created to help teach this lesson!
Using our material, an introductory lesson about the Holy Mysteries could go as follows:
- Use one of the suggested introductory hands-on activities below to discuss what a Mystery is.
- Present the seven Mysteries using the provided slideshow and/or the relevant printouts from the printable packet.
- Mention the symbols for each Mystery with the help of the images provided in the printable packet above. Don’t elaborate on the symbolism itself, just focus on the fact that through these real, physical objects, the invisible grace of God is transmitted.
- Work on reinforcement activities.
What is a Holy Mystery?
Presenting the concept
In the Orthodox Church, even though the term may be commonly used in English, we do not really talk of sacraments, which are rituals that make things sacred; rather, we talk of the Holy Mysteries: The acts through which the invisible and incomprehensible God becomes present in our life and in our world. The word “mystery” is derived from the ancient Greek μύειν (MEE-in), which means to close one’s eyes. Therefore, a Mystery is something hidden, that we know exists, but we cannot fully comprehend.
This is a very abstract concept for young children to understand – in fact, the youngest ones cannot grasp it at all. However, by using one of the following activities, we can make it more concrete. They are all based on the same idea: Something that is not obvious at first glance is revealed after some manipulation. The fact that we weren’t able to see it at first doesn’t mean that it wasn’t there all along. In the same way, even though we can’t see the grace of God coming down on us through the Mysteries, we know that it is actually present.
PLEASE NOTE: We do not receive any financial compensation for providing links to specific products. We are just sharing our experience, to make it easier to our readers to find the products we use, if interested.
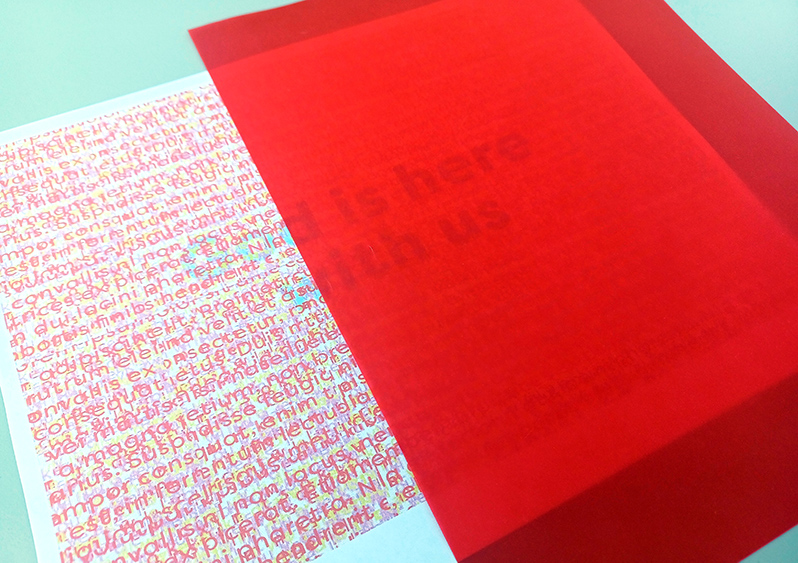
1. Secret agent decoder
You will need:
- The relevant pages from the printable packet above. We created more than one, so there can be a variety of messages if you are working with a group.
- Pieces of red cellophane wrap. For a more exciting option, decoder magnifying glasses can be used. In the photo above, we tried some red vellum paper that we had leftover from another project, and it worked well.
Print as many color copies of the hidden message pages as you need, at least one for each student. At the time of the lesson, the children cover their page with the red translucent material and reveal the hidden message.
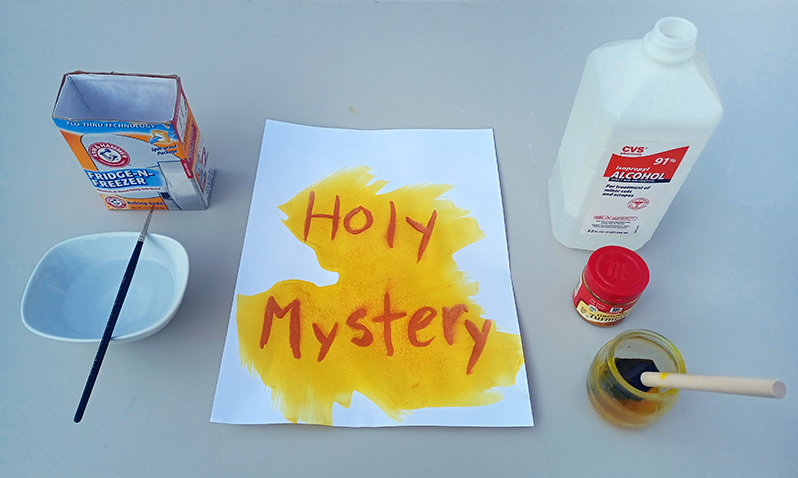
2. Invisible ink
You will need:
- 0.5 cup water
- 1 tbsp baking soda
- 0.5 cup rubbing alcohol, with no color added to it
- 1 tsp turmeric
- White paper: Even though plain paper works well enough, it is better to use a sturdier kind of paper, as the children will be getting it wet. An option that we often use is this one.
Mix the water with the baking soda to make invisible ink. Use a paintbrush to write your messages onto several pieces of paper, especially if you are teaching a larger group – the children will all want to have a go at revealing a message, most probably more than one. Let the paper dry.
Mix the rubbing alcohol with the turmeric and store the mixture in a small container. At the time of the lesson, the children can use paintbrushes to spread the turmeric mixture onto the paper and reveal the hidden messages.
*Note: The turmeric mixture can stain! Protect the table you are working on and be careful not to get it on your own or on the children’s clothes!*
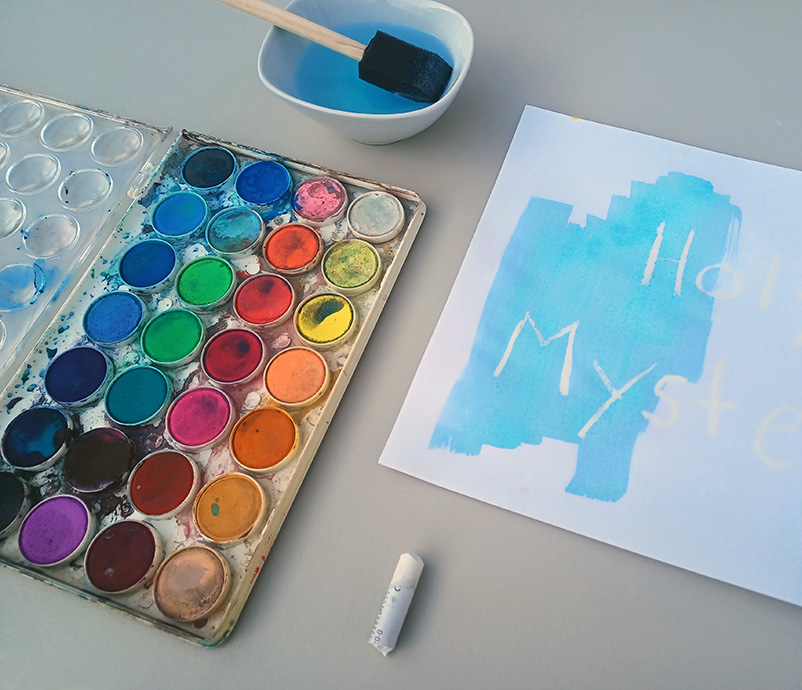
3. White crayon and watercolor
You will need:
- A white oil crayon
- Watercolors and water
- White paper, as in the previous activity
Using the white oil crayon, write your messages on the white paper. At the time of the lesson, the children use a paintbrush to spread some watercolor onto the paper to reveal the messages.
4. Mystery box

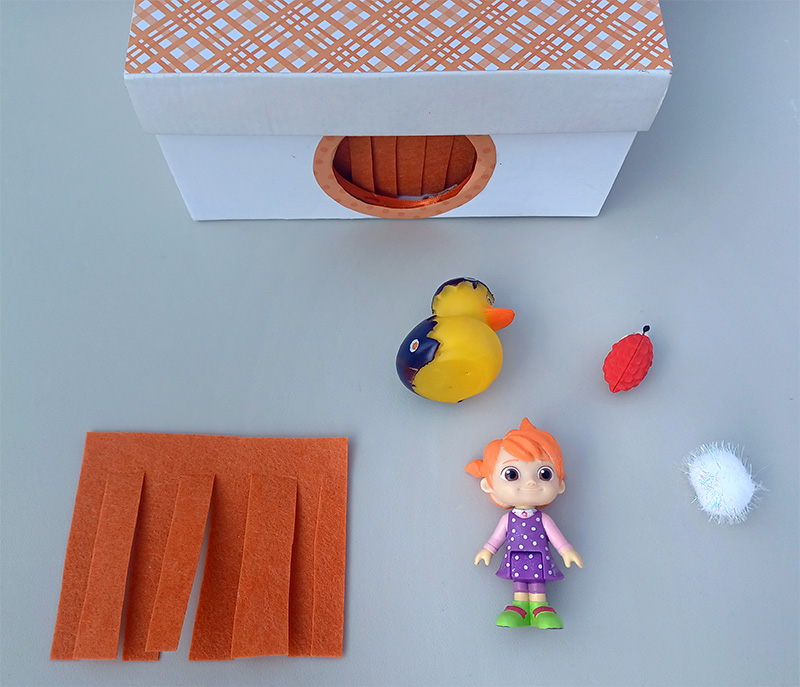
You will need:
- A box, such as a shoe box
- A piece of felt, about 4″x5″.
- A few small objects such as a walnut, an eraser, a clothespin etc. You need at least as many objects as there will be children. For a fun addition, you can use little toys that the children then get to keep.
Cut a hole on one side of the box, large enough for the children to fit their hand through, around 3.5″ in diameter. Cut a few vertical slits in the piece of felt, about 0.5″ apart. Don’t cut all the way through the piece of felt, but instead leave about 0.5″ on the top of the piece uncut, so that it looks like a fringe. Glue the top part of the felt inside the box to cover the opening, with the felt strips hanging down so the children can’t peek at what is inside the box, but can easily push their hand through. You can decorate the box and the opening if you wish. Place the small objects in the box.
At the time of the lesson, have the children feel inside the box with their hands. Each child holds an object, tries to guess what it is, then removes it from the box to double check.
Alternatively, you can use an opaque bag instead of a box. A brown bag works fine; you can decorate it as you please, and put the objects inside. The children will need to close their eyes before they put their hand inside the bag.
Reinforcement activities
In our printable packet, you will find resources for the following activities:
- Word puzzles, for younger and older children
- Crossword puzzle
- Cards to play a matching or memory game, and/or to make a booklet or a mobile (see instructions below)
- Match the Mystery to the phrase
How to use our cards
Print out the relevant pages on sturdy paper and cut the cards out. Alternatively, you can laminate them for sturdiness.
Booklet
The children write the name of each Mystery on the back of each card. Holes are punched on one corner of the cards, and the cards are bound together using a loose-leaf binder ring or a piece of ribbon.
Mobile
Take a long piece of ribbon. Glue or tape each Mystery illustration onto the ribbon, one card under the other. Then, for each Mystery, glue the card with its name back-to-back to its picture, sandwiching the ribbon between the two cards. Tie a loop at the top of the ribbon for hanging. You can tie or glue any desired decorative objects (such as buttons, pompoms, sequins etc.), at the bottom end of the ribbon and/or between the cards.
Matching activities
Use the picture cards, the name cards, and/or the symbol cards in any combination. Printing on the white (back) side of scrapbooking paper will produce cards with a pretty design on the back.
Match the image of each Mystery to its name and/or symbol. You can separate the children into teams working at the same time to see who can finish faster.
Play a Memory game. Lay the cards face down. Each child gets to pick up two cards, with the aim to pair a picture with its name or symbol. If the child doesn’t find a pair, the cards are flipped over and the next child takes a turn. If the child does find a pair, and in order to keep it, s/he has to briefly describe the purpose of this Mystery. When all the cards are collected, the winner is the child with the largest number of cards.
BACKGROUND
For Orthodox Christians, the Mystery is what comes forth after the collision of our earthly reality with the divine grace of God. It is the means by which our Lord works in His Church, the manifestation of His saving power. By participating in the Holy Mysteries, we can see ourselves, our lives, and our world as the Kingdom of God that they truly are and were meant to be; we can experience eternal life here and now. Through the Mysteries, we are called to become holy (set apart for God), because our God is holy (Leviticus 19:2b).
In the Orthodox Christian Mysteries, the use of symbols plays a crucial role. The origin of the word comes from the Greek verb συμ-βάλλω (sym-VAH-loh), which means “to bring two or more things together”. The symbol is the physical, visible object through which God’s invisible redeeming and sanctifying grace is conveyed. For example, water is the symbol of Baptism, and chrism or myrrh is the symbol of Holy Chrismation.
Usually, seven Mysteries are counted: Baptism, Chrismation, Holy Eucharist, Confession, Marriage, Ordination, and the Unction of the sick. These are the Mysteries that we are working on in this page. The first four Mysteries are mandatory in the life of an Orthodox Christian, while the last three – Marriage, Holy Orders, and Holy Unction – are voluntary.
However, the practice of enumerating the Mysteries in this way is quite new, and was actually influenced by the Roman Catholics. The more ancient and traditional Orthodox practice is to regard everything that is in and of the Church as mystical. In that sense, there are several occasions that can also be considered as Mysteries, such as the Blessing of the waters, the Churching of the mother and baby after forty days, the Funeral, the Memorial, the Blessing of the five loaves (Artoclasia), or the Monastic tonsure. For an Orthodox Christian, even acts that are not performed at church or by a priest, such as prayer or works of charity, still share in this mystical dimension.
Explore further
- The Orthodox Faith – Worship, Fr. Thomas Hopko, Orthodox Church in America
- The Sacramental Life of the Orthodox Church, Fr. Alkiviadis Calivas, Greek Orthodox Church of America
- Understanding the Sacraments of the Orthodox Church, Fr. Thomas Fitzgerald, Greek Orthodox Church of America
- “Be the Bee” video series, Episode 112: “A Church of Mysteries”, Youth and Young Adult Ministries, Greek Orthodox Church of America
- “Be the Bee” video series, Episode 119: “What is a Sacrament?” , Youth and Young Adult Ministries, Greek Orthodox Church of America
